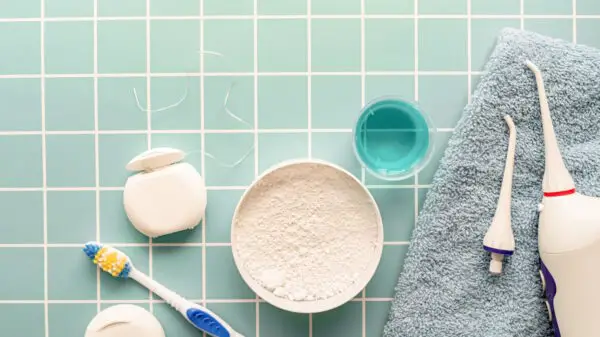
A Step-by-Step Guide on How to Clean Waterpik Water Flosser
Maintaining good oral hygiene is essential for overall health, and a Waterpik water flosser can be a valuable tool in your dental care routine. Regularly cleaning your Waterpik is crucial to ensure that it functions effectively and remains free from bacteria buildup. In this article, we will provide you with a detailed, step-by-step guide on how to clean Waterpik water flosser, helping you maintain a healthy and beautiful smile.
Tools and Materials You’ll Need For How To Clean Waterpik Water Flosser
Before we dive into the cleaning process, gather the following tools and materials:
- Warm, soapy water
- White vinegar
- Soft brush (e.g., a toothbrush or a small bottle brush)
- Clean cloth or paper towels
- Small bowl or container
- A wrench (if your Waterpik has removable parts)
- Your Waterpik water flosser
Step 1: Unplug and Empty the Reservoir
Safety first! Start by unplugging your Waterpik from the electrical outlet to avoid any accidents. Next, remove the water reservoir and empty it completely. Rinse it with warm water to remove any leftover debris.
Step 2: Remove and Clean the Tip
If your Waterpik has a removable flosser tip, gently detach it from the handle. Rinse the tip under warm water to remove any residual toothpaste or debris. For a deeper clean, soak the tip in a mixture of warm, soapy water for a few minutes, and then use your brush to clean it thoroughly. Rinse the tip again with warm water and set it aside to dry.
Step 3: Clean the Reservoir
Fill a small container or bowl with a mixture of equal parts warm water and white vinegar. Place the water reservoir in the solution and allow it to soak for about 5-10 minutes. The vinegar will help to dissolve any mineral deposits or bacteria that may have accumulated.
After soaking, use your soft brush to scrub the inside of the reservoir, paying special attention to any hard-to-reach areas. Rinse the reservoir thoroughly with warm water to remove any remaining vinegar residue.
Step 4: Clean the Water Flosser Handle
Dip your soft brush into the warm, soapy water and use it to clean the exterior of the Waterpik handle. Pay attention to the buttons and crevices where dirt and bacteria can accumulate. Rinse the handle with warm water and wipe it dry with a clean cloth or paper towel.
Step 5: Check and Clean the Water Inlet
Inspect the water inlet on the bottom of the Waterpik handle for any debris or blockages. If you notice any buildup, use your soft brush to gently clean it. This step is crucial to ensure the proper flow of water during flossing.
Step 6: Reassemble and Test
If you’ve removed any parts, such as the flosser tip or the water reservoir, reattach them to the Waterpik handle securely. Ensure that all components are properly in place. Plug your Waterpik back into the electrical outlet and test it to make sure it’s functioning correctly.
Once you’ve completed the cleaning process and everything is back in working order, wipe down the exterior of your Waterpik with a clean, damp cloth to remove any remaining residue or fingerprints.
What Happens If I Don’t Clean Waterpik Water Flosser
If you neglect to clean your Waterpik water flosser regularly, several potential issues may arise:
- Bacterial Growth. Without regular cleaning, bacteria can accumulate in the water reservoir, flosser tip, and other components of the device. This can lead to the proliferation of harmful bacteria, potentially affecting your oral health.
- Mineral Deposits. Tap water often contains minerals, and over time, these minerals can build up in the Waterpik, especially in areas with hard water. This can compromise the device’s effectiveness and potentially clog or damage internal components.
- Reduced Effectiveness. Residual toothpaste, debris, and bacteria in the flosser tip or reservoir can diminish the device’s cleaning effectiveness. This may result in incomplete plaque removal and a less thorough oral hygiene routine.
- Unpleasant Odor or Taste. Bacteria and debris accumulation can lead to unpleasant odors or tastes in the water used by the Waterpik. This not only affects the user experience but may also discourage consistent use of the device.
- Risk of Mold Growth. Moist environments are conducive to mold growth. If the Waterpik is not properly cleaned and dried, mold may develop in hidden areas, posing health risks and potentially damaging the device.
- Potential Malfunctions. Mineral deposits and bacterial growth can lead to malfunctions in the Waterpik, affecting its performance and longevity. This may result in the need for repairs or the premature replacement of the device.
- Compromised Oral Health. The primary purpose of a Waterpik is to enhance oral hygiene. If the device is not kept clean, it may not effectively remove plaque and debris, increasing the risk of issues such as cavities, gingivitis, and gum disease.
To ensure the optimal functioning of your Waterpik water flosser and maintain good oral health, it is crucial to adhere to a regular cleaning routine as outlined by the manufacturer. Regular maintenance will not only extend the life of the device but also contribute to a more effective and hygienic oral care routine.
The Bottom Line
Regularly cleaning your Waterpik water flosser is not only essential for maintaining optimal oral hygiene and prolonging the life of your device, but it also ensures that you are getting the most out of your oral care routine. By following this step-by-step guide on how to clean Waterpik water flosser, which includes using a gentle cleaning solution and thoroughly rinsing all components, you can rest assured that your Waterpik remains free from harmful bacteria, unsightly mineral deposits, and other contaminants that can build up over time. With a clean and well-maintained Waterpik, you can continue to enjoy the benefits of efficient and effective oral hygiene, promoting healthier gums and a brighter smile. So, take a few moments to give your Waterpik the care it deserves, and reap the rewards of a truly refreshing and satisfying oral care experience.
Related Questions
How often should I clean my Waterpik water flosser?
It is recommended to clean your Waterpik water flosser at least once a month to ensure optimal performance and maintain good oral hygiene. However, if you notice any signs of residue or bacterial buildup, more frequent cleaning may be necessary.
Can I use regular tap water in my Waterpik, or is distilled water necessary?
You can generally use tap water in your Waterpik, but it’s important to check the manufacturer’s guidelines. If your tap water has a high mineral content, using distilled water can help prevent mineral deposits in the device. Additionally, regular cleaning of the Waterpik will help address any mineral buildup concerns.
Is it safe to submerge the Waterpik handle in water during cleaning?
While the Waterpik handle is designed to withstand exposure to water during normal use, it is not recommended to submerge it in water for an extended period. Instead, use a damp cloth or a brush with a small amount of water and mild soap to clean the exterior of the handle. Ensure that the device is unplugged during the cleaning process.
How do I clean hard-to-reach areas inside the Waterpik reservoir?
To clean hard-to-reach areas inside the Waterpik reservoir, a mixture of warm water and white vinegar is effective. Soak the reservoir in this solution for 5-10 minutes, and then use a soft brush to scrub the interior, paying attention to corners and crevices. Rinse the reservoir thoroughly with warm water to remove any remaining vinegar residue before reassembling the Waterpik.
How often should I replace my Waterpik water flosser?
Waterpik recommends replacing the Classic Jet Tip, Implant Denture Tip, and Tongue Cleaner every 6 months because mineral deposits can collect and reduce performance over time. For tips with bristles, they recommend replacing them every 3 months. Similar to a toothbrush, the bristles can splay, making the tip less effective


